Pages

Friday, November 28, 2014

Etsy Shop

In keeping with the theme of shopping on Black Friday (which I do not usually participate in), I am announcing the re-opening my Etsy shop.  You can visit it here.  For now, I have some of my original prints and some of my smaller, older fabric artworks in the shop.  Currently, my Etsy shop is the only place that I have my original prints online.

Here is one that I don't think I have shared with you yet.

Cross Beds
drypoint print on paper in an edition of 7
image size: 6" x 4", paper size: approximately 9" x 7"
©2014 Lisa Flowers Ross
$45 
available in my Etsy shop

Tuesday, November 25, 2014

Thought of the Day

“When you have completed 95 percent of your journey, you are only halfway there.” 
- Japanese Proverb

Sunday, November 23, 2014

Befriending Time and Place

This post is a little late, but there is still time to see Rachel Teannalach's exhibition, Befriending Time and Place, at Gallery Five 18 in Boise.  It is up for the month of November.  You can read her artist statement for the exhibition on her blog.


I attended the opening reception because I was excited to see Rachel's 365 paintings.  Rachel is a plein air painter and she has been painting a small (3" x 3") canvas every day for a year and posting them on her Facebook page as she completed them.  But seeing photos on Facebook doesn't compare to seeing them all together in the gallery and realizing what a great commitment the project was.  It "reads" like an artist's journal, recording the place and moment each painting was made.


As you look more closely at the individual pieces that make up the whole, you might recognize some familiar places in Boise and  around Idaho.  You might also notice images from foreign lands where Rachel has travel within the past year.  You definitely need to spend quite a bit of time to take it all in.


Other artworks in the exhibition also record a passage of time.  Some sets of paintings were made in a time lapsed manner with each painting being created at a regular interval of time.  The viewer gets to see the progression of changes in color and lighting of the same scene within a day.  It is a good reminder for us to take some time to linger in a place, get to know it and notice what is around us.

Expanding the time interval even longer than hours or days, Rachel painted four pieces that show the changes of sagebrush in different seasons.


There are plenty of time periods to contemplate in viewing this exhibition.  But there is not a whole lot of time left for you to see it.

Saturday, November 22, 2014

Tips for Painting Windows

In the last post, I talked about the Winter Windows.  Over the years, I have come up with a few tricks to make painting the windows faster, I think.  I will share them with you here, in case you want to take up window painting or just decorate your own for the holidays.

Painter's Tape:

Blue painter's tape is handy to use when doing house projects and it is also handy to use for painting windows.  I have used it a few times to mark off areas and then paint.  When you pull off the tape you have a nice edge.  I used a lot of tape for this window to create the trees.  I used the regular size for outlining the trees and then a quarter inch (quilters tape) for little lines inside the trunks to make it look like birch trees.


This year I used painter's tape again, but in a new way.  On the reindeers' "blanket" that is on their backs, I had drawn a heart. I didn't want to have to hand paint around that heart for every reindeer. I came up with a way to create a mask with the painter's tape.

I laid down overlapping strips of the tape onto the shiny side of freezer paper.  I drew my heart and cut it out.  Now, I could just peel off the freezer paper,  stick the heart on the window and paint on top of it.  I made six hearts and also did the same thing for the eyes.


Here is one of the eyes I cut from a corner leftover from cutting out the hearts. You can see the freezer paper here.

Helpful hint: It is best to pull off the freezer paper in a direction that is perpendicular to the lines of the tape.  When I was getting ready to place the first heart, I started to peel it off from the point and realized that wouldn't work as I also pulled off the first layer of tape.  It was easy enough to put back on, but the rest were pulled from the side and I had no problems.

Here is the tape on the windows with the two eyes, the heart and the curved lines of the blanket are the quarter inch tape.


Paper Template:

To paint the outline of the reindeer, I created a paper template.  Basically, I drew the design on a piece of paper, really several pieces of paper taped together.  Then I could tape the paper to the outside of the window and paint the lines from the inside.  I used this technique before when I painted the Fortune Cats. (If you are painting on the outside of the windows, tape the template to the inside of the window.)


Using a template makes the design more uniform.  If you trace the drawing on both sides of the paper, then you can just flip it to have a reverse image.

Here is a pix of the outlining in progress.   

This is a pretty big template.  When I was taping it on one of the windows, a guy outside jokingly said, "What? No free-hand?"  I said I free-hand drew the template and I wanted all of the reindeer to be the same.  What I really wanted to say was,  "I don't want to be here for three weeks and they aren't paying me enough to have six original free-hand painted reindeer."  Or how about, "Why don't you try doing this?" (I know, bad attitude.  But I didn't say it out loud.)

After I outlined all the reindeer, I rolled on the paint to fill the body with a small paint roller (it's only about 3-4" wide) that you can get at the home improvement stores.  You can also get the roller tray the same size, which is just perfect for holding in your hand.


Above is one reindeer all rolled up right over the tape.  (It looks better from the outside.)  Then, I just pulled off the tape and here's the result.


Stamps:

In the picture above, the stars were made using home-made stamps.  Last year, I figured out this idea when I did snowflakes.  I also wrote a tutorial about how to do it here.

This year I made a star stamp and a heart stamp.  I learned something more this year.  You don't want to make the stamps too big or they get hard to work with.  Also, it is easier to do if the stamp is more "lacy," having less surface area for the paint to be on and to make it less likely to slip on the window.  My first star was bigger than the one above.
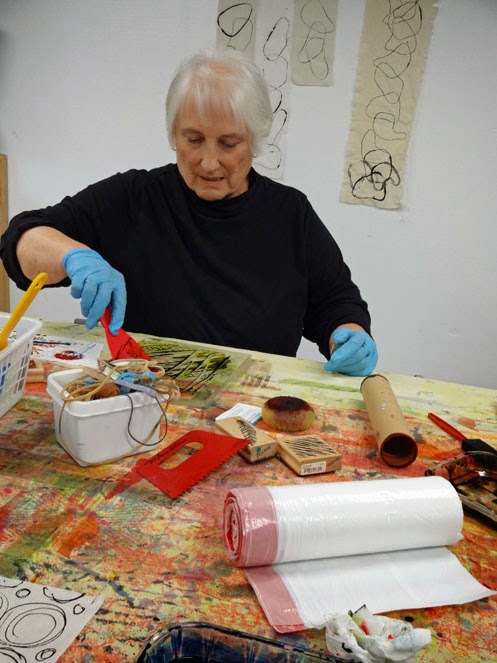
Brushes:

My last tip is about brushes.  I used a large foam brush and a small foam brush to paint these windows (in addition to the roller).  I brought a small bristle brush just for touch up.  The foam brushes are nice because they can hold a lot of paint and can cover a large area.  I also just used the edge of the large foam brush to make the snowflakes you see on the window (using an "x" on top of a "t" shape).  This made them go very quickly.

There might be some better ways to do these things, but this is what I have come up with over these past five years.  Now, you are all set to go paint some windows!

Thursday, November 20, 2014

Winter Windows 2014

On Wednesday, I did my annual Winter Windows painting.  For those that don't know, the Boise Downtown Business Association organizes the Winter Windows each year.  They match artists that sign up with businesses downtown that want their windows decorated for the holidays.


This is my fifth year of painting windows (you can see the windows from the other years here: 2010, 2011a, 2011b, 2012a, 2012b, 2013).  I think this might be my last time.  Last year, I noticed that there didn't seem to be as many businesses that had their windows painted.  This year, I requested to go back to painting two businesses.  But I found out they had more artists than they had businesses sign up this year, so I got one.

Once again, I got the Idaho Trust Bank.  The second time in three years.  I feel they have some of the biggest and largest number of windows to paint.  I asked if I could have a new business since I had just done their windows two years ago, but that couldn't be worked out.

I started to sign up to paint the windows because I thought what the artists were doing with it was cool and I thought it would be fun to come up with some creative design that went with the business. Through the years, I found out that some business owners have their own ideas of what they would like style-wise and others are happy with whatever you come up with.

All artists are paid the same flat fee no matter what business you get.  If you get a business with a few small windows, then I think you are pretty lucky.  Over the years, I have started trying to be creative in the sense of how fast could I paint the windows.  Because the faster you paint, the more you actually make on a per hour basis, based on the flat fee.  The first year I probably made way less than minimum wage because of the amount of time I put into it.

That's why I was somewhat disappointed that I had been chosen to do the bank again because it would take longer to paint 18 large windows.  Also, they had their own idea of what they wanted this year so I needed to change my original design.  However, since they want their windows painted from the inside (I'm not sure why, except to maybe avoid vandalism), I was very grateful I did not have to be painting outside in 14 degree weather!

I had 9 hours put into the design work and getting templates and stamps ready before I even started painting.  It took me 6 hours to do the actual painting, which I thought was pretty good for doing it by myself.

Each year I have come up with what I think are some time savers and will share them with you in another post.  Today, I will show you the finished windows.


 Detail of one of the border designs taken from inside.

There were a total of six reindeer, three trees and all the windows had borders at the top and bottom and snowflakes.

Tuesday, November 18, 2014

Thickened Dye Fabrics

Today, I want to show you the fabrics I created when my friends and I played with thickened dye. There are a variety of ways to use the thickened dye.  In this first photo, I applied the dye with the edge of a flexible piece of plastic (like a credit card).


This fabric below was pieced and I added the lines on top with the edge of a plastic tool. I wanted to see if the dye color would change in relation to the background color it was on.


These next two pieces were made with a special Martha Stewart tool that Linda had.  It had a bunch of small brushes lined up on the tool.  This first photo shows the bottom of the fabric folded up because the back side looks a little different than the front.


There were lots of different ways to apply the thickened dye to the fabric, but I kind of got stuck on drawing lines using a small bottle I had with a fine tip.  Here you can tell I started drawing from the left to the right.  Not sure how to not get the blob at the beginning of the line.


 Drawing fast scribbles at an angle.

More scribbles in a random curvy motion.  The bottom edge is what the fabric looked like without the scribbles.

Drawing leaf-like shapes.


For this last piece, I drew a bunch of circles.  Then, I scraped over it with that gold-ish color.  Since some of the circle color hadn't quite penetrated the fabric and was sitting on top, I got some smears.  


I like these last two a lot and would like to explore this more.  All the pieces I used were small scraps that I brought just to try things out.  I don't know what I will do with them.  But whatever it is, it will have to be small.


Friday, November 14, 2014

Blog Hop

My friend, Linda McLaughlin, has tagged me as part of a Blog Hop in which we answer four questions about our artwork.  I also saw that Terry Jarrard-Dimond answered the same questions for what I assume is the same blog hop, which she said was originated by Kathleen Loomis.

Here are the questions and my answers:

1) What am I working on?
Right now, I am currently not working on any artwork.  I am working on the business part of my art. I just finished two pieces in my Foliaris series.  There are several different series that I am still working on.  Foliaris is one, In Vein  and Vertical Nature are a couple of others.  Lines and Greenbelt are also series that I consider are still "open" for more work, but not high on the priority list right now.
In Vein II

2) How does my work differ from others of its genre?
Hmm, I guess it depends on what the definition of genre means.  Does that mean the genre of textile artworks? Or the genre of abstract artwork?

I think the way I abstract things is different from other artists' work.  Of course, I have my own vision that is portrayed in my artwork and is, hopefully, unique and different from other artists.  I also think in my pieces where I do a lot of free-motion stitching, it is a distinguishing factor for those artworks.

Detail from A Nod to M.R.


3) Why do I create what I do?
As far as subject matter, I create what I do to show people another way of seeing what is around us everyday, or to portray a new perspective.

I think any artist that is asked this question would say that there is a need inside them that drives them to create.  This is what I feel.  It is also my best way to express and share my views of the world around me.


Yellowstone Impression #4


4) How does my creating process work?
In general, I start with an idea or something I have seen that has inspired me.  I create very small thumbnail sketches in my sketchbook.  From there, I start pulling out fabric colors for the piece I am starting.  Then, I will free-hand cut the shapes, referencing my sketch, and start piecing them together.

On occasion,  if I want something just so, I will create a paper pattern first  to work from.  For Foliaris VIII, I wanted that exact curve that is prominent in the piece. So I projected the image and created a pattern.  Foliaris VII was just free-hand cut and I did have to un-sew and make a few adjustments as I went along.


At times, for a break or to just "play" without a previous sketch to draw from, I will use fused appliqué to create a small piece and sometimes add some hand stitching.

Leaf Stack #7
©Lisa Flowers Ross

The second part of this blog hop is to introduce you to another blog to hop to.  I am choosing Terry Grant.  I have followed her blog and art for years.  She has a unique style and I like her use of black lines in her art.  More recently, I like how she is using pieces of plaid shirts in her work that she has found at thrift stores and has over-dyed.

Terry said she has already participated in this blog hop several months ago.  So I will point you to the link where she has already answered these questions.

Thursday, November 13, 2014

Chocolate Gulch

The opening reception at Silvercreek for me and Reham was this past Saturday night.  Before leaving Ketchum on Sunday, I took an early morning hike.  It was pretty chilly and the sun was just coming up.

I parked at the Fox Creek Trailhead and hiked the Chocolate Gulch Trail.  There was a little bit of snow on some areas of the trails.  I only saw a few other people.

The sun was coming up.

 And the moon was still out.


I don't like taking selfies.  I am not very good at it and it is too close.  But since I was hiking alone, here I am.  Even though it was frosty, I still sweat when I make any kind of exertion.


Lines on a log.


It was a good hike.  But I don't know why they call it Chocolate Gulch;  I didn't find any chocolate!

Monday, November 10, 2014

Thick Dye

I have been pretty busy the last couple of weeks getting ready for my opening at Silvercreek Art and I am a little behind here posting about some things.

Last week, I spent another day in Weiser playing with thickened dye with my friends Linda, Thea, Sue and Trische.  Linda is generous with her knowledge and letting us play in her studio.  She showed us some things to do with thickened dye.

Here, Linda is preparing a screen for deconstructed printing.

Thea is printing circles with a found object.

Trische is using thickened dye on a Gelli Plate to create a mono print.

This is a piece of practice fabric.

Here are a couple of Trische's mono prints.  For the one on the right, she "scraped" thickened dye on top of the mono print.

This piece of fabric is printed with a screen that had bubble wrap pressed into print paste to create the texture.  It was printed in blue.  Then, different colored dyes were "scraped" on in sections.


I am embarrassed to say that I have yet to rinse out my fabrics.  I will post them when I do.  I found that I liked drawing with the thicken dye in a bottle and that is what I did on most of my fabrics.