Pages

Monday, October 28, 2013

Day of the Dead Banners

Last Thursday and Friday, Amy (from Wingtip Press), Kurt (education curator at the Idaho State Historical Museum), Judy, Mary and I spent some time in the old Macy's department store downtown hanging a few of the steamroller printed Day of the Dead banners in the windows.

The banners are also at the Idaho State Historical Museum, Sesqui-shop, Zions Bank and the Flying M Coffee Garage in Nampa.

I did not know when I first arrived to help that the store windows were painted and that we would have to scrape off the paint.

Looking out the painted windows.

One set of the windows wasn't too bad to scrape.  The windows on the sunny side were a pain to scrape off.

Judy scrapping.

Kurt working on the hard stuff.


We were hanging the banners with pvc poles and fishing line.  But the fishing line we had was too thin to hold the weight.  So we had to scrounge for nails and wires in the building to get them hung.

Amy up on the ladder.


You can see the pink polka dots on the side which is just the edge of one of the "Goodbye Kitty" prints. Next to the grim reaper, it makes for an interesting juxtaposition. 

In celebration of Dia de los Muertos, there will be a procession of the banners on Nov. 2 from the Sesqui-shop to the Idaho State Historical Museum.  More details here.

Sunday, October 27, 2013

Crooked River Trail

We heard that the weather would be turning cooler and less sunny on Monday.  And even as I type this, the wind has picked up and the clouds have moved in.  It looks like the beautiful autumn weather we have been having the last week or so is at an end.

That is why we decided to go for a long hike yesterday.  We drove up past Idaho City and went on the Crooked River trail.  There wasn't as much fall color there, compared to in the valley, as we were mostly up in the pine trees and the rest of the plants were past their prime.  But it was still beautiful and there is color if you look for it.
Anna on the trail.


Thursday, October 24, 2013

Little Free Library

We have a new Little Free Library in our neighborhood.  This one is around the corner and down the street.  There is another one we can go to if we want to take a long walk.


Do you know about the Little Free Library?  This is a great idea where someone builds a small structure to hold books that neighbors can bring a book to add and/or take a book to read.  Read more about it here on the Little Free Library website.  They have tips on how to build your own (and ask you use recycled/found materials) and you can register your Little Free Library on their map.

I like the knob on the one above.  If you do a image search you can see how creative people were in building their little library.

I like how this one re-used a newspaper box.

Anna would like this one.

And this one is really outside the box, so to speak.

Monday, October 21, 2013

Get Together

This weekend I got together with three of my creative friends.  We try to get together every so often to share what we have been working on.  Even though we may see pictures online, it's always better to see it in person.

Linda shared her weekly stitching project with us.  I really like the texture she gets with the all over hand stitching.  She uses simple stitches but is amazing in how many different patterns she can create with them.


You can see better photos of more of these on her blog.

I sometimes use hand stitching in my artworks, but not to that extent.  I only have this one piece that is mostly covered in hand stitching.  I am sending it to The Arts Center ArtShop in Corvallis where some of my small works will now be available.

Three Trees
hand dyed fabrics, fused appliqué, hand stitching
12-3/4" x 8-1/2"
©2012 Lisa Flowers Ross


Kathleen had some of her postcards out that we could cut up and rearrange into different compositions. A fun idea.  Here is a new arrangement I created.


Kathleen has a solo exhibition coming up in Jan. 2014 at BSU in the same space I had my solo exhibition.

Our friend, Barbara, showed us a picture of some costume pieces she created for the play she is also directing!

Afterward, we went out to lunch at a Thai restaurant.  What a great way to spend the day.


Friday, October 18, 2013

Fall Friday

Yesterday was such a beautiful autumn day.  Even though I knew I should be in the studio working, I decided to go to the park (Katherine Albertson's park) after my exercise class to enjoy the beautiful sun and autumn colors.  Since much of my work is inspired by nature, it's good to be out in it.  It was probably a good thing too, as in the afternoon it was breezy and many leaves fell.

Here are some of my pictures.  I used my little point and shoot camera but there were a couple of ladies there with the same idea and they had their large cameras, as well as a monopod.


Thursday, October 17, 2013

Display Wall

Earlier in the week, I showed you some pictures from my open studio set up.  In my living room, I had put up this display unit to show pieces in my Greenbelt series.


I made this a couple of years ago when a friend of mine asked me to participate in a market event she was organizing.  I do not wish to do art fairs/markets where you have a booth.  But since this event was indoors and my friend was organizing it, I decided to try it once.

We were assigned a 6' foot space and could rent a table.  I knew I needed some kind of display wall on which to hang my artworks.  But I didn't want to invest in one.  So, I decided to make my own.

I am no designer, nor furniture maker.  But I am an artist and, therefore, a creative problem solver.  I had some free pieces of wood that were leftover from a museum project that I had taken thinking maybe someday I would make a shelf with them.  Instead, I used some for this project.

I purchased some felt fabric, shelf brackets, two curtain rods and some hardware pieces.  I made up the design myself.  And while I was putting it up again this year (I also used it last year in my open studio), I thought that I really need to redesign it because it is not that easy to hang things on the felt.

I designed it this way for several reasons.  First, I knew that I would have to be able to put it together and take it apart by myself.  I would also have to get the pieces in my car and carry them myself.  I also didn't want to have to store a very large unit.

In this picture, you can see that the top bar slides into a groove on the side bar and is held together with a dowel rod.  The pieces of wood I had were about 1" x 1" and I put three pieces together.  A dowel piece also holds the curtain rod in place and can be removed.


The bottom bar also slides into a groove on the side and is held with a dowel.  I used the shelf brackets on the base of each side bar.  They work and it is pretty stable when all put together but there is room for improvement.


I sewed a pocket on the top and bottom of the felt for the curtain rods to slide through.  When taking it down, I can remove the rods and just fold up the fabric.  The whole thing takes up little storage when disassembled.

The problem is that it is very hard to hang the artwork because the felt is not stiff.  I pin the pieces on but don't want the pins to show.  I can't hold the piece and go around to the back and pin from there.  So I pin from the front and try to hide the pins.  If I want to adjust to make it level, it is hard to do.

I'm thinking maybe I could make some panels with foam core or something else to create a stiff surface.  I would have to retrofit the top and bottom bars with something to hold them.  But then I would have to store those larger pieces.  I will think about it some more.  It is not a high priority on my list.  Since I will probably continue having open studios and setting it up, though, it would be nice to have something a little different.  Any suggestions are welcome.

Terry Grant was creative in recently creating her own display wall.  You can read about it here.  Wish I would have thought of that.

Tuesday, October 15, 2013

Steamroller Printmaking

The other big event this past weekend was the Steamroller printing at the Idaho State Historical Museum.  It was a collaboration between the museum, Wingtip Press and Boise State University.  The workshop at Wingtip Press in August was a precursor for this event.

Some school classes, BSU students and local artists have been carving for weeks on 4' x 8' (or 4' x 4') pieces of MDF board.  A friend and I worked on one 4' x 8' board together.  She came up with the idea and design.  I helped tweak the design a little and we both did lots of carving.

The theme for the prints was Dia de los Muertos (Day of the Dead).  There will be a procession of the prints through downtown on Nov. 2 They also will be on display at the Historical Museum's annual Day of the the Dead celebration

Here is our board with Goodbye Kitty (as opposed to Hello Kitty) as we were just getting started on the carving.  A huge thank you goes out to Amy Nack at Wingtip Press for helping us attain the board, letting us keep the board at her space and transporting the board to the museum.  I'm not sure we would have participated without her help.


Marigold flowers are one of the symbols for Day of the Dead.  The scent of the flower is suppose to help draw the deceased back to earth for the annual celebration.  We integrated several of our own version of marigolds into the design.

On Saturday, we volunteers went to the museum early to set up.  The printing was done on the road behind the village outside of the museum.  When I arrived, the boards were leaning against buildings and fences everywhere.  There were around 50 boards that needed to be printed three times each.  We were told that we would need to print one every 9 minutes to get through them all that day.

It was very well planned and coordinated.  There were two "inking" stations set up (two blocks were printed at once by the steam roller).  Latex house paint was rolled on the boards by two teams of inkers.  The blocks were printed on sheets, so there was a team of people laying down sheets on the printing area.  Another team of guys were in charge of carrying the blocks from the inking station to the printing area and back again.  Other people helped hang up or lay out the sheets on the grass once they were printed.

I helped with rolling the paint on the blocks.  Once we got going, things went smoothly, we had a good rhythm and were able to get everything printed.  Some of the school classes came to help with their prints and many people came by to watch.  A DJ was there playing music and it was a great community event.

Here are some of the blocks lined up waiting to be printed.  They already have color on them because the artists toned the boards to make it easier to see the design when carving.

In this picture you can see the two "inking" stations.  There were mostly BSU students volunteering and just a few others, like me.


Here you can see the sheet laid out on the ground and the guys getting ready to flip the board face down onto the sheet (this is opposite of what you would normally do with a regular printing press).


Below, my friend, Cassandra, is driving the steam roller over the boards (under the carpet pad).  There are two boards laid out.  She drove over them once and then backed up over them again.
And some of the results!


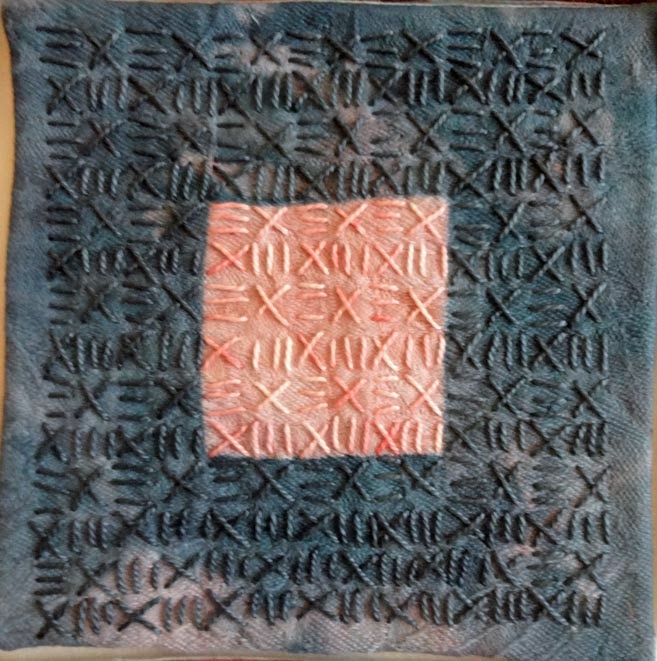
Some of the sheets were donated by BSU (old ones they weren't going to use anymore), but artists were also asked to bring their own since there wasn't quite enough.  We thought Goodbye Kitty really needed to have some pink sheets and we were able to find some at the thrift stores.

This sheet also had pink flowers. 


If you missed the event, you can see the prints at the Idaho State Historical Museum.  It was a fun event and the biggest piece of art I have made to date.  All the prints turned out really well.


Monday, October 14, 2013

Phew!

My hectic weekend that I have been getting ready for for about a month is over!  It was a full, busy, good weekend.  Saturday, I volunteered at the Steamroller Printing event which was from 10 - 4 p.m. at the Idaho Historical Museum (I will write about it more in another post.) A friend and I have been carving on a 4' x 8' woodblock for weeks for the event.

Saturday night, I saw the play, Red, at the Boise Contemporary Theater.  I highly recommend seeing it if you are in town.  It was excellent.

My open studio was Sunday as part of the Boise Open Studios Collective event and I've been getting ready for it for several weeks as well.  I had a pretty good turnout.  It sounded like overall there were lots of people visiting studios all over town on Saturday and Sunday.

If you wanted to visit and couldn't, contact me and we can set up an individual visit.

Here are a few pictures.  I had more work out this year than I did last year, so it wasn't quite as streamlined as last year.  Since I am new to BOSCO this year, I also had BOSCO maps and passports out and a few of my original prints available for viewing in a portfolio.

For this first picture, I used the panoramic setting on my camera.  It is a bit distorted.


In the other room, I had more of my artworks displayed along with a few snacks and flowers from the yard.  I also had some exhibition catalogs and fiber related books out.


Because of the new passport program this year (visit 8 different studios over the weekend, get stickers on the passport and then turn it in for a chance to win art from the BOSCO artists),  I had some visitors that had never seen my artwork before.  I also had a couple of people that had never seen any fabric art before.  And yes, some people just came to get their passport stamped. But they still saw my art.

Even though I had no sales, I think it was good exposure and I enjoyed meeting new people and discussing my art with them.