Pages

Friday, October 28, 2011

Getting Ready

This past week I have been busy getting stuff ready for the Wintry Market.  This is a fine art and craft event being held at Ballet Idaho (8th and Myrtle streets) Nov. 5 & 6.  I will have my smaller artworks for sale there.


I have been preparing artworks for display, building a display wall and cutting mats for some pieces.  I don't know why, but it always seems like I have to create a big mess to actually get organized.  


Next week I will try to post a preview of some of my works for sale at the event.


Below is some more info. about the Wintry Market event.  Put it on your calendars for a little holiday shopping.


On Saturday Nov 5 and Sunday Nov 6, 2011 from 10am-5pm. 
Located in the Ballet Idaho Auditorium space on 8th and Myrtle Streets in downtown Boise. 

There will be Free Admission to the public during the two days of the sale. 

This event will serve as an upscale and inventive indie art/craft show during the holidays. The Market will consist of innovative and original items produced using traditional art/craft methods. There will be diverse crowd of vendors providing items available at Wintry Market; to keep the Fair fresh and exciting! And we pride ourselves as being an affordable marketplace for handmade goods.

We have planned for approximately thirty vendors, visit the blog for the current vendor list.

Organizers: Amy Pence-Brown and Kristin Montgomery. 

Website
http://www.wintrymarket.blogspot.com/

Wednesday, October 26, 2011

Color Fields #12 and #14

I seem to have trouble keeping track of which pieces of this series I've posted.  Somehow, I think #12 got missed.
Color Fields #12
hand dyed fabrics, 
machine pieced and machine quilted
13" x 13-1/4"
© 2011 Lisa Flowers Ross


And here is #14.  This is the piece of which I gave you a sneak peek at the quilting.

Color Fields #14
hand dyed fabrics, 
machine pieced and machine quilted
41-1/2" x 36"
© 2011 Lisa Flowers Ross

Monday, October 24, 2011

Color Fields Continued

Here is another piece in the Color Fields series.  I tried something a little bit different on this piece for this series.  I used variegated threads for the quilting.  It really stands out.  What do you think about it?

Color Fields #13
hand dyed fabric, machine pieced,
free motion stitching
27" x 26-3/4"
© 2011 Lisa Flowers Ross

Detail of stitching


Thursday, October 20, 2011

Color Fields Revisited

This Color Fields series has been occupying my attention for quite a while.  I think I'm ready to move on to something different now.  Although I said that before and ended up having more ideas.

I don't think I ever got around to showing you the finished version of Color Fields #4.  I showed you it before quilting here.  But here is the finished piece.

Color Fields #4
hand dyed fabrics,
machine pieced and quilted
34-1/2" x 66-3/4"
© 2011 Lisa Flowers Ross

Monday, October 17, 2011

Akua Inks on Fabric

Last Monday, I did another Monotype Monday session at Wingtip Press.  It was my third time working with the Akua inks. The first was learning about them in a workshop with Melanie Yazzie.  The second was a Monotype Monday session where I decided to try printing on fabric.  And the third, was last week.

I did not bring any fabric to print on this last week.  But I did get out my previous mono-printed fabrics to try "fixing" the ink.  I had heat set them with an iron, but on a few I had gone back and added some color with colored pencils that needed to be fixed.

I thought I would try mixing matte medium with water and coating the fabric with that.  I mixed quite a bit of water with the medium.  When I put it on the first piece, I realized I could not brush it across as the ink smeared somewhat.  So, I pounced the mixture on.  Thinking the mixture was too runny, I added some more medium.  But the next piece was about the same.

After a while, I decided to try straight acrylic medium on the fabric.  It seemed a little better.  Eventually, I decided to get a piece of mono-printed fabric, cut it into sections and test different fixatives on the pieces.  Yes, I should have done this at the very beginning (maybe even before printing a whole bunch of fabric), but I am still learning.

Here is a photo of the cut up piece.


This fabric was heat set with the iron before I cut it up.  The skinny strip is the original fabric with nothing else done to it.  The first section on the left was sprayed with a fixative that you use for drawings, pastels, etc.  Then I rinsed it under water with my hands agitating it.  Some of the color was removed (and it actually is a little lighter on the fabric than what it looks like in the picture).

The second large section was just rinsed under water the same way with no fixative added.  Some color was also removed.  The smaller section in the upper right corner had matte medium mixed with water applied to it and then rinsed.  There is a little bit more of the color removed.  The bottom right section had matte medium directly applied to it (with no water added) and some of the color still came off, although not as much.

My conclusion is that some of the ink gets absorbed by the fabric, but then some of the ink might just "sit" on top of the fabric and that is what gets removed when adding any kind of liquid to the fabric.  How much the particles bond to the fabric, I have no idea.  I don't know if more ink would come off with continual washing as I have not tried that yet.  Also, I do not know how light fast it is on the fabric as I have not done any testing of that either.

The other thing I could try is to soak the fabric in soda-ash water and let dry before printing on it.  The soda-ash helps dye bond with the fibers of the fabric, maybe it would help the ink bond.  However, the dyeing is a chemical reaction and the Akua inks are water-based (which makes them so nice to use), so it may not make a difference.

Therefore, I think I will only use paper for the Akua ink mono-printing for now.  I will add stitching to the fabric pieces on which I added colored pencil and finish them. (By the way, it didn't seem like any of the colored pencil came off after fixing and washing, but it is a little hard to tell).  They still have quite a bit of color and the thread will add more.  The pieces where I just created patterns on the fabric, I'm going to try running through the washing machine and see what happens.

Has anyone else tried the Akua inks on fabrics?

Thursday, October 13, 2011

New Kitchen

 The painting of the kitchen is complete.  I think I was unclear in my first post about the kitchen and wallpaper removal.   I did not do any of the work myself.  I did not want to tackle that wallpaper on the ceiling.

I did ask the painters to leave all the plastic up and cabinets covered when they were done so I could sand the butcher block counter (you see under the large window) without dust getting into everything.  That meant that I did have to remove all the tape and plastic from everything, and touch up the edges.

I have done the touch-up, cleaned all the cabinets and counters and mopped the floor.  The kitchen has not been this clean since we moved in (and probably wasn't this clean when we moved in.  The previous owners weren't considerate in leaving a clean house behind.)  Frank will be replacing all the outlets (which we have been meaning to do for several years), which is why none of them have covers on them.

We are planning to get new shades for the windows and glass door.  We also have some glass in the cabinet doors shown below that needs to be replaced with something more modern and less country.
I'd also like to get a new sink and faucet (not this little bar sink in the picture below).

I'm not sure how well the color actually translates in these pictures.  We did one wall with the lighter color as an accent wall and also because I didn't want the area under that cabinet to be too dark. I wanted a mocha-like color for the main walls, but the color we picked has a lot of orange in it.  I like it very much and it goes with the rest of the house much better now.

For a while now, I have been looking for two comfy, smallish arm chairs to put in the kitchen.  I haven't found any yet within my price range and/or that are easily available.  For now, I just took two chairs from our deck and brought them inside (since they would be put away for the winter anyway).


We used to have a wicker settee with a coffee table in this location for a long time, even though the area is meant for a small eating table.  I noticed when people were visiting our house, everybody ended up in the kitchen and I wanted them to have a place to sit.  Besides, we eat at the counter or in the dining room.

The settee was nice for two people to sit on, or Anna could lay down on it when she was little.  It was white and not really our style, but it was what we could find at the time.  Eventually, I removed the coffee table and then decided the settee had to go to.  That's when I started looking for chairs, occasionally.  In the mean time, I just put one chair similar to these in that spot, along with the little table.  It's a nice place to sit.

Now, I guess I need to step up the search for some armchairs.  Although Anna thought these were just fine.  I'm also trying to decide what artwork(s) I want to put on the wall.

I'm glad we are back to a fully functional kitchen now.

Wednesday, October 12, 2011

Quilting Close-up


I really want to show you all some art.  But I need to set up a photo shoot and get some pictures first.  I have been working on some things.  So here is a close-up of the quilting on Color Fields #14.  There is a lot of close stitching on this one and on Color Fields #13, of which I am working on right now.

I realize I haven't done this much free-motion stitching in a while.  My shoulders get really tense when I do this kind of stitching.

I will post the finished kitchen pictures tomorrow.

Monday, October 10, 2011

Thick Dye

Last week I tried using thickened dyes for the first time.  I tried it on some silk organza.  I was in a bit of a hurry to make sure I was doing it on our last really warm day and, therefore, didn't really have a great set-up.  But here are some of the pieces.  I drew lines with a squirt bottle.

Below are two pieces side by side.

Since I used organza, when I layer them I can create new patterns.  These are three separate pieces.

This is a piece that I just folded back on itself at a 90 degree angle.  There are lots of possibilities to create patterns by layering several pieces.
The last one is two different colors layered on top of each other.


I'm not exactly sure what I'll do with these.  But hopefully, I will find a use for them sometime.

Thursday, October 6, 2011

Patio Finished

I guess I haven't shown you the finished outside project.  Here are pictures of the finished patio with a fire ring.  We are happy with how it turned out.  But we still have work to do getting things rebuilt, replanted and back in order.

We are planning to have a gas line run to the fire pit.  I think it will be very nice to just be able to turn it on and off, just like a gas fireplace.  I don't think we will probably be able to use it this year.


Wednesday, October 5, 2011

Kitchen Work

Even though there is still a mess from our outside project, this week we started a new inside project.  Finally, we are having the wall paper removed from the kitchen and the walls painted.

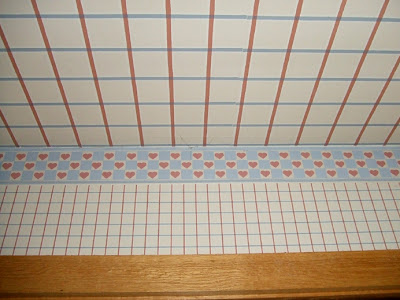
We have lived here for 13-1/2 years and with the wallpaper that was here when we arrived.  Why have we not tackled this sooner?  Because they decided to put wallpaper on the ceiling!  Since we have done a lot of the remodeling in our house ourselves, this ceiling is something we have avoided.  (All these pictures were taken after I had removed everything from the counter and walls.  It is never this neat.)


The wallpaper is not so bad that it is not livable (obviously, we have been living with it for a long time).  But country, eighties is not our style.  This year I just had enough of it and decided we needed to just have someone else take care of removing the wallpaper and painting.  That's what is happening this week.


Don't you just love the border with hearts?  So not our style!  Hopefully, I will have some "after" pictures soon.

Tuesday, October 4, 2011

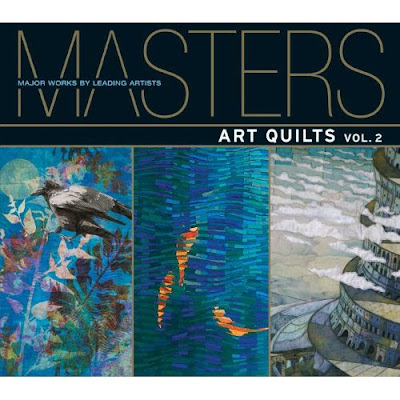
Masters Art Quilts Vol. 2

Have you seen this book?  I was fortunate to win a copy on one of the blogs Lark Crafts had on their blog hop to promote the book.  It was so exciting for me to win this book.  I have since received it and have read it already.  It is a really nice book with lots of great pictures.

I was familiar with some of the artists in the book, but many were new to me.  There are 40 artists and each has a one page essay written about their work by Martha Sielman.  Then there are up to nine pages of artwork images for each artist.  Some image pages also contain quotes from the artists themselves.

It was interesting to read how they worked.  Quite a few used raw edge appliqué.  I like to piece my work because I like that nice graphic line.  I always think it would be quicker to work with an appliqué technique.  But I digress.  There are many different techniques and styles represented in the book.

Now, I think I need to get the Vol. 1 book.

Monday, October 3, 2011

Working Studio

I thought I would give you a glimpse of my sewing studio while it is being used.  It is a bit chaotic.  Last week I was working on the quilting for the piece you see lying next to the sewing machine.  It is on top of a piece of white foam core that is clipped to my sewing table and another little table against the wall.

This "bridge" works pretty well for quilting bigger pieces.  Some day I hope to get a harder board and attach a small piece of wood to my sewing cabinet to support it.  That way it will lay flush with the table and there will be no bump as there is with my foam core.

On the design wall there are a couple of finished Color Fields pieces and a few that still need to be quilted.

Sunday, October 2, 2011

Concert #2

Last night Anna and I went to see the Plain White T's in concert (her second rock concert) at the Knitting Factory in downtown Boise.  I have never been there before.  It is a fairly small venue.  It's an all ages place, unless they specify otherwise for certain events.  Anna got two big black x's marked on the backs of her hands because she was under 21.  I got the yellow wrist band to indicate that I'm slightly over 21 and could purchase alcohol.

There were a few tables, but of course we did not get there early enough to stand at the front of the line to get one (they may have already been taken by VIP people anyway).  No cameras were allowed, but I did take a picture of Anna with my cell phone.  We found a table upstairs to sit at while the three opening acts were playing (I think one would have been plenty).  You can see some of the technical equipment and the lights above the stage behind Anna. It was after 10 p.m. before the Plain White T's made it to the stage.

At that point we did go downstairs so we could see them, but had to stand in the "pit" the whole time.  They rocked and I didn't mind standing because then you could dance a little and you could actually see their faces.  The majority of the people in attendance appeared to be females under 21. 

At one point, the lead singer asked how many people were old enough to go out after the show.  A few of us "old" folks raised our hands. Then he asked how many people were young enough to still have fun without drinking.  That was everyone else. 

I'm glad we got to see them, but both of us were really tired today.


Saturday, October 1, 2011

Thread Colors

I forgot to get some thread ready to dye along with the fabrics I dyed.  I still had some dye leftover and decided to go ahead and do some threads, even though they won't match.  I didn't have any white DMC to use, but still had some white perle cotton thread in size 8 and 12.  Below are the colors, most of which are variegated.